~ For people who are passionate about respecting the earth, walking in nature, observing wildlife, local diet, making do, repurposing, organic gardening, foraging for wild plants and fungi, natural health, scrumptious healthy cooking, renovations, DIY, crafting, raising children simply and mindfully, taking time for stillness, and living in harmony with the seasons.
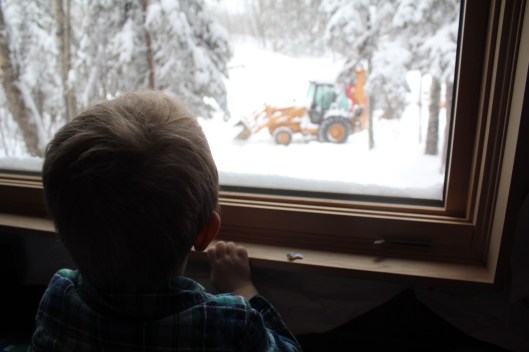
On September 20, 2015, we installed a new window in one of the bedrooms of the cabin. The old window was put in by the previous owners and it wasn’t a very good one. The panes didn’t fit together properly and it let in a lot of cold air in the winter.
Pictured above is the old window. Brian sourced a new window on Kijiji (he is amazing at finding things on that site) and bought it. It was brand new and beautiful in its wooden frame. We stored it until Brian was ready to install it. As it was larger than the old window Brian and his dad, Dale, cut a larger hole in the cedar logs. (Dale is outside standing in the loader bucket of his backhoe.)
Once the hole was measured and cut, Dale and Brian brought the window over in the backhoe and installed it. They were quick and efficient as they had installed windows many times before. Chayton stayed in the room the entire time despite the cold and performed the important task of handing tools to daddy and grandpa. He was very interested in the whole process.
The backhoe made the job a lot easier as it provided a platform to stand on and did all of the heavy lifting.
This new window has really added to the quality of our lives: it is more attractive both inside and out, it is larger so we can now view the chicken coop from up there, and the bedroom is a lot warmer now in winter.
This project was a small step (among many) that we have been taking over the years toward maintaining the cabin and making it more energy efficient.
Over Christmas holidays I went sledding two days in a row with my favorite lake family. On the second day, we spent four fun-filled hours vigorously sledding through Battle River territory, through a beautiful canyon and up what we call “Battle Mountain”. When we reach the top of the mountain and were taking a break to enjoy the view, one of the men started talking about the cache that was hidden there. I had no idea what a cache was, so one of the girls crawled under a large spruce tree and came out with a metal box, looking a hundred years old and painted in ‘camo’ colors. Apparently geocaching is a very popular sport among people who love treasure hunts and who regularly travel through wilderness areas around the globe via sleds, quads, jeeps, skis, horseback, by foot, etc. One is given the geographic coordinates of the cache and then must use all of their orientation skills (and/or a good GPS) to find the hidden cache. Once you find the cache, you can open it and can take anything out of it as long as you leave something of equal or greater value. (Our cache had a few hot wheel cars still in the packaging and a cigarette in a ziplock bag.) Of course the main reward is the satisfaction of the finding.
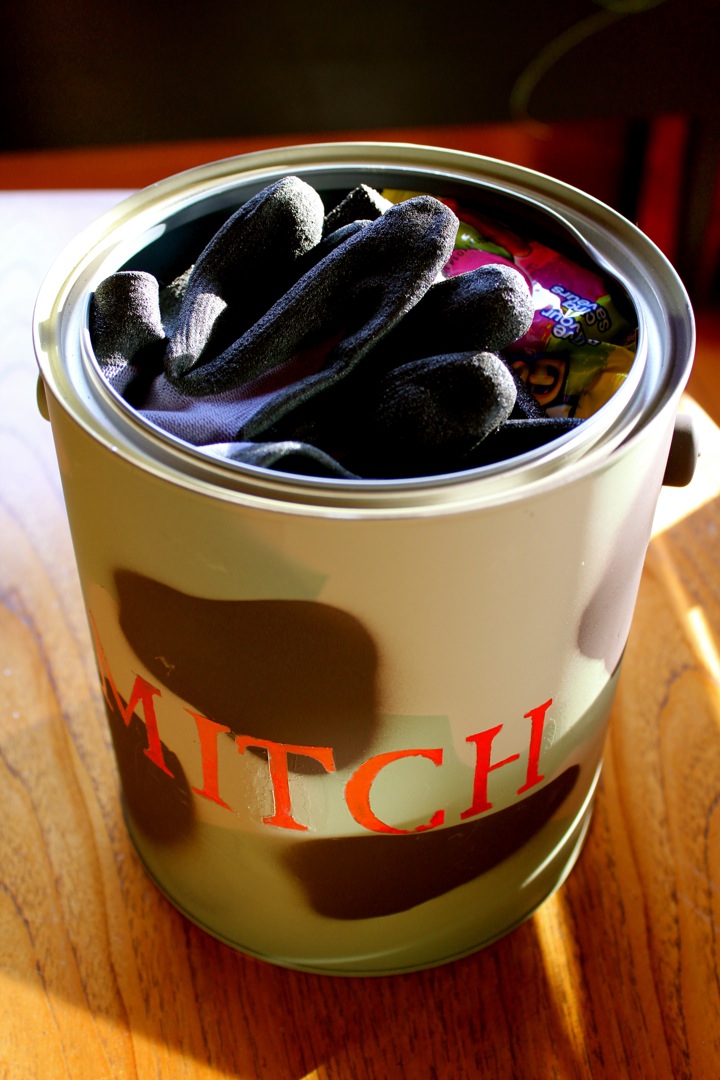
I loved the idea of a cache hidden away with treasures stored within… I had already begun Christmas shopping for little gifts for Mitch and Erin, mainly for practical things that they can use at their fort. I decided to create a cache tin for each of them to hide at the fort. That way they can store their treasures and supplies in a way that is safe from weather and animals, and is easily hidden.
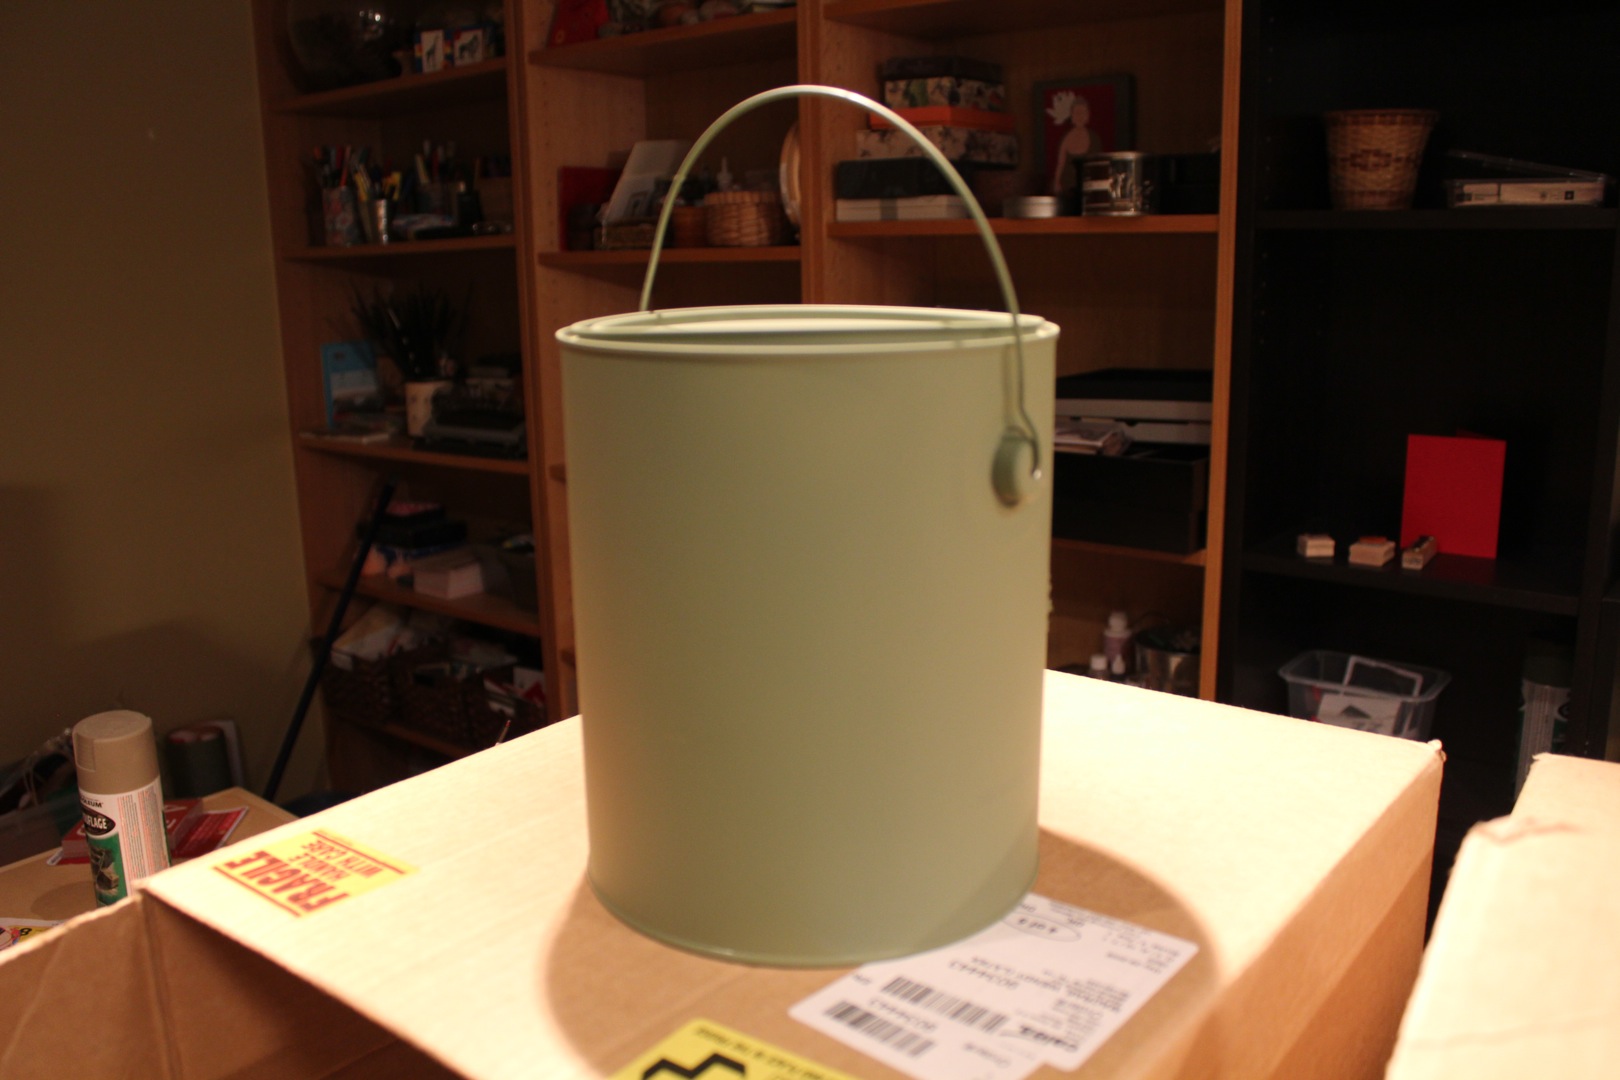
I started with a brand new, empty paint can. You can buy these in a variety of sizes at your local hardware store for under $5 in the paint section. I also bought 3 different colors of ‘camo’ Tremclad (for metal) spray paint. I began with a few coats of the light green.
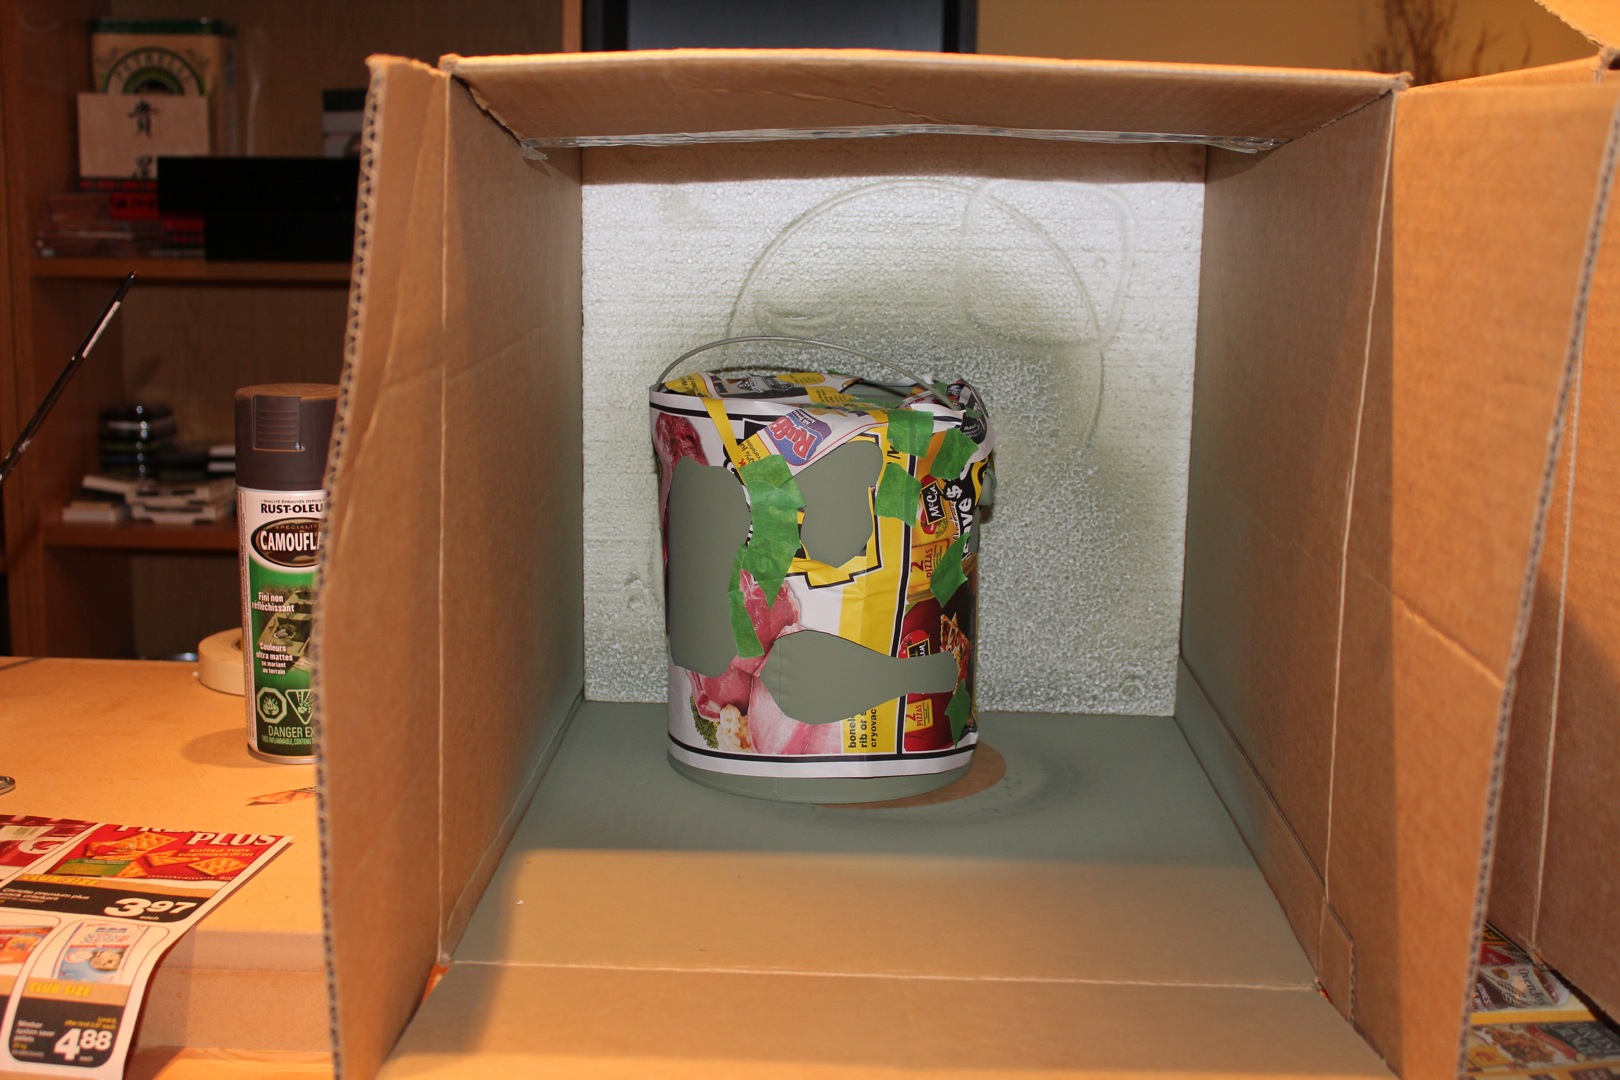
As it is winter, I had to do this project indoors in my craft room. To minimize the vapors, I sprayed each can in it’s own cardboard box. Instead of a stencil, I randomly cut out small rounded shapes out of newspaper and taped this around each paint can. I also used a round piece for the top.
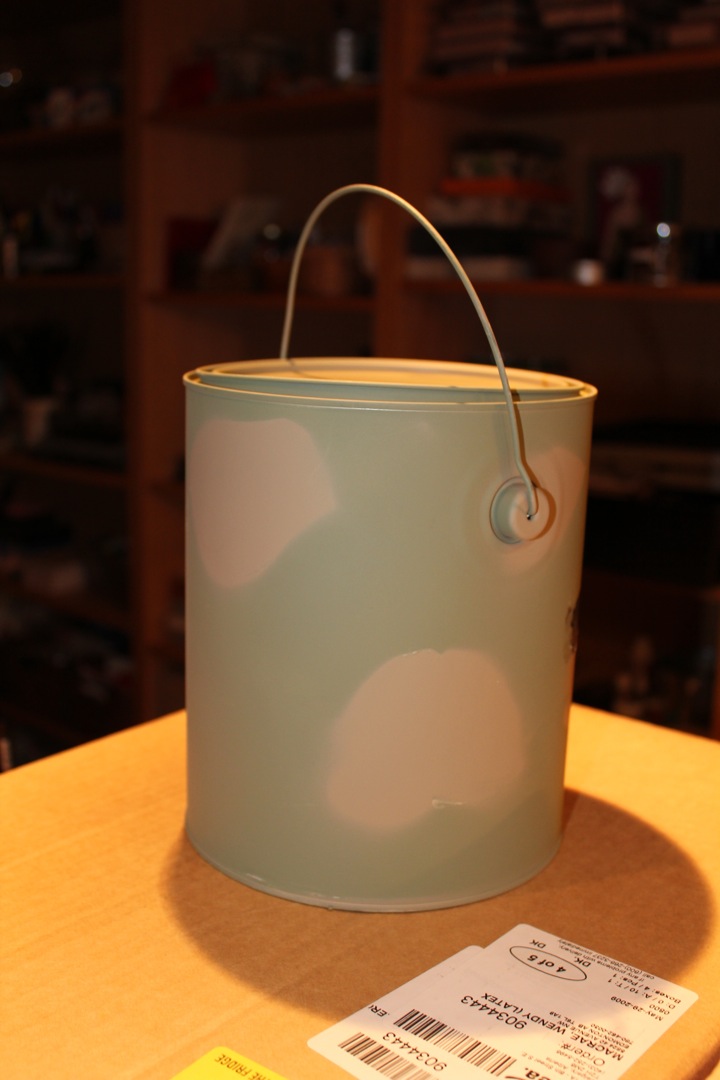
I repeated the same process using the light beige paint and then the dark brown. Then I stenciled their first names on the can using a bright red Tremclad paint (for metal).
The fun part was filling and sealing the cans!
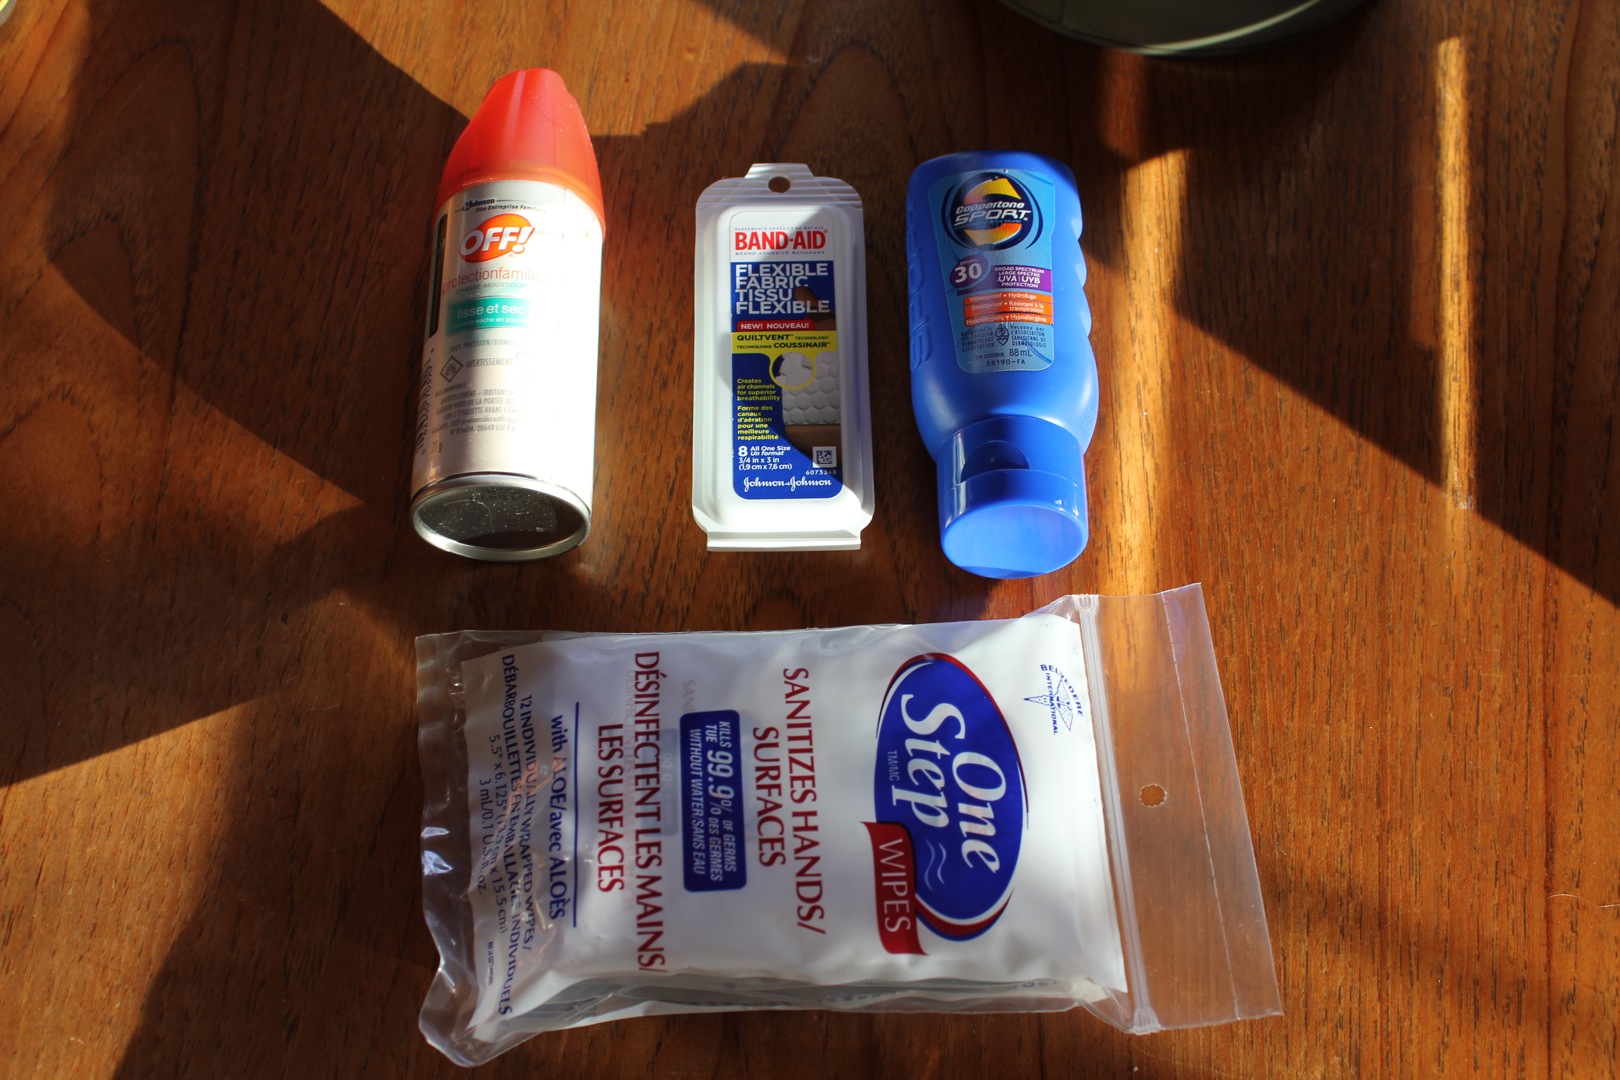
Both cans contained OFF bug spray, Band-Aids, sunblock and hand sanitizer.
Mitch’s can contained work gloves, a variety of carabiners, a paint brush, Gorilla Glue, a sanding block, a small clamp, padlock hardware and a small, but sturdy pair of pliers.
He also received a thermometer, a set of journals and some snacks.
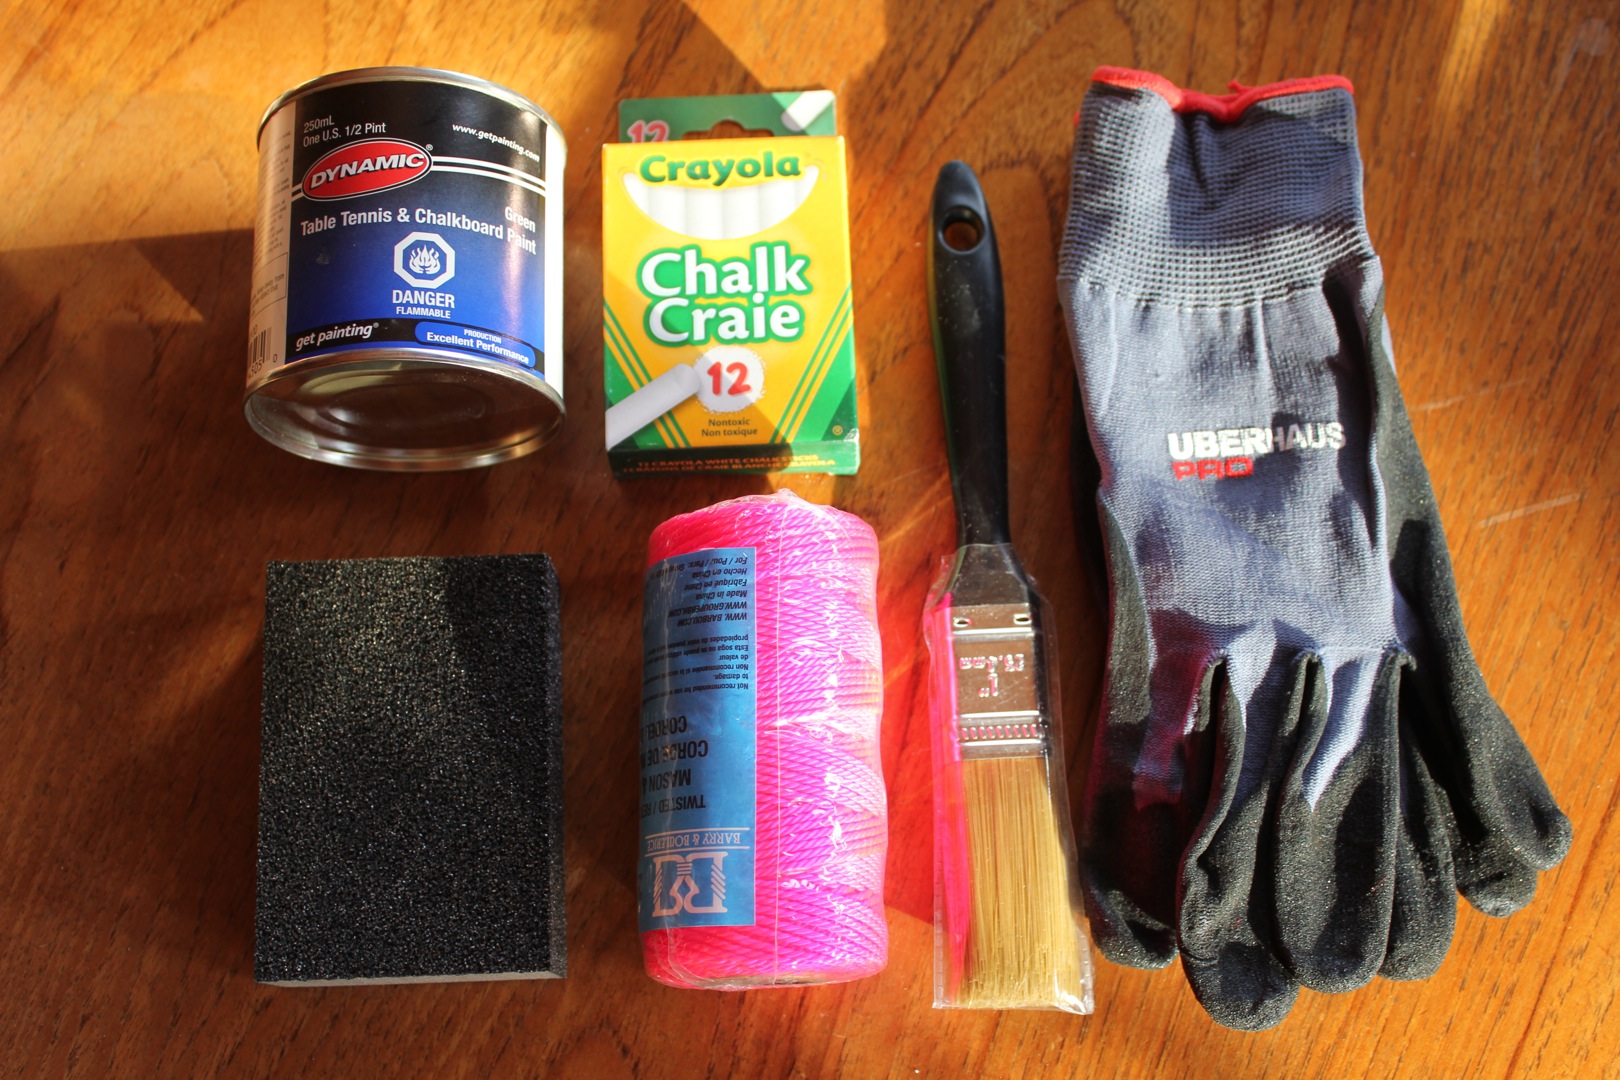
Erin’s can also contained the same snacks as well as a small can of chalkboard paint, chalk, a paintbrush, work gloves, a sanding black and a roll of pink twine.
She also received a variety of stickers, rubber stamps, a mini office kit, a note pad and a leather journal, funky, paper clips, animal post it tabs and Burt’s Bees chap-stick and cuticle cream.
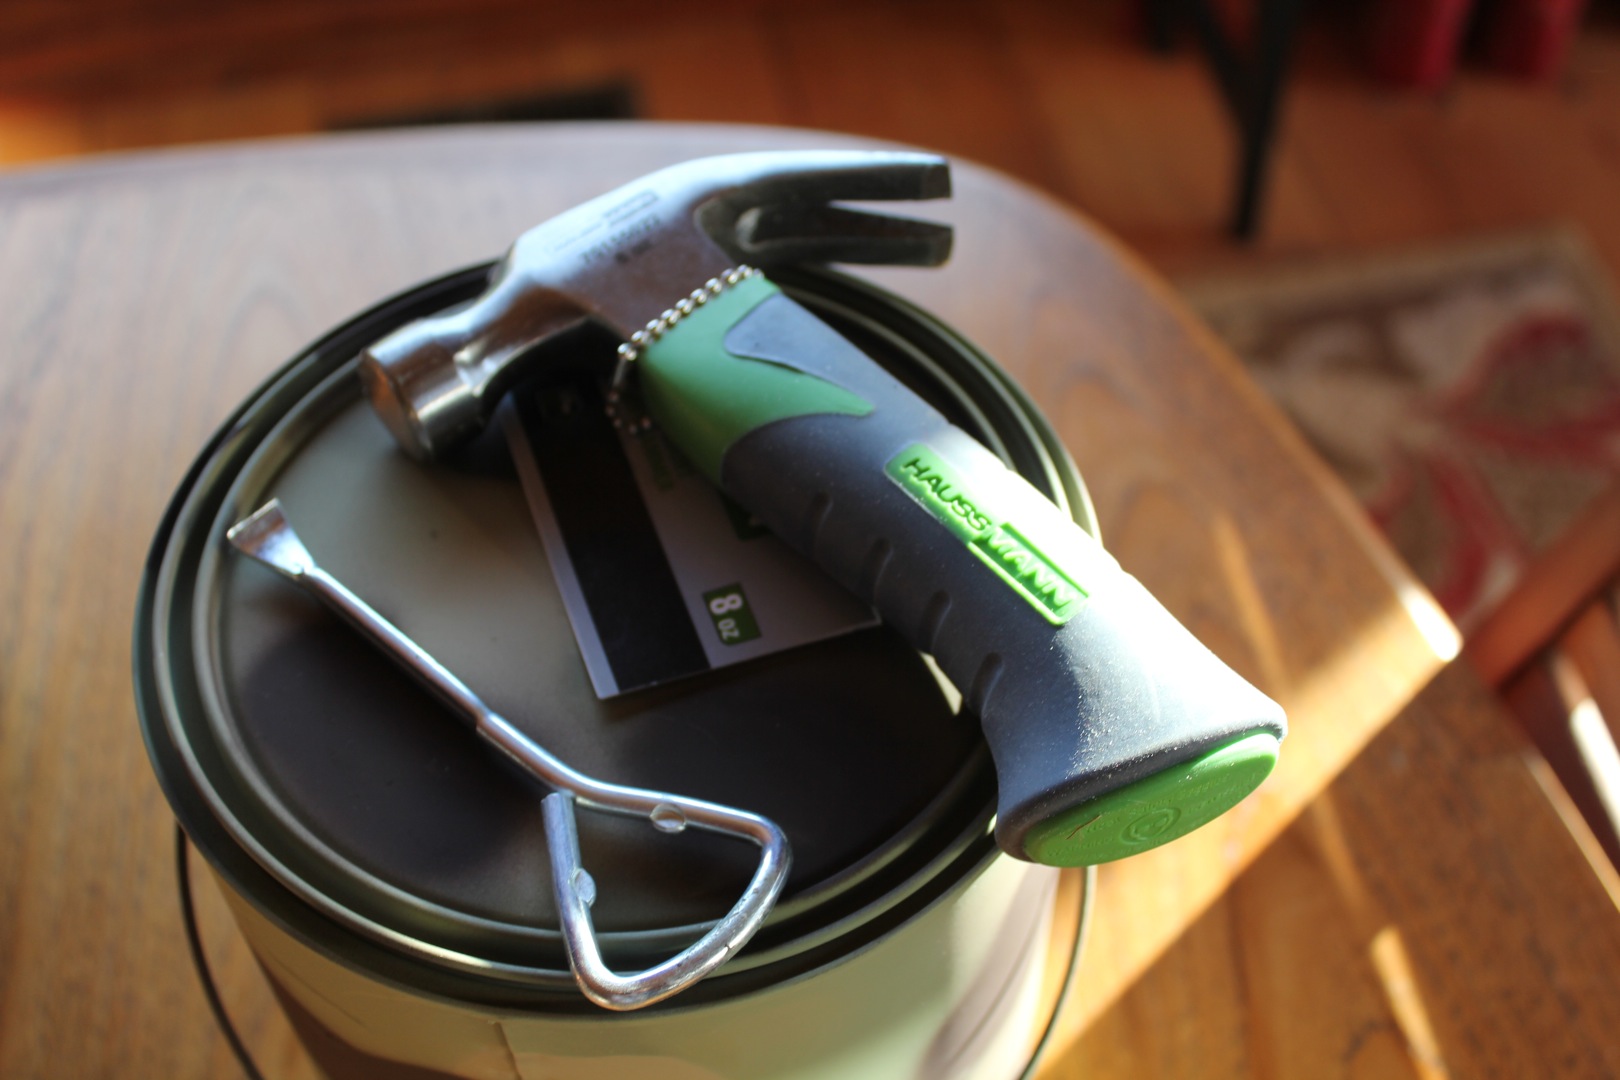
Both cans came with a “key”: a paint can opener and I threw in one mini hammer to close and seal the cans.
It was so delightful watching my friends open their Christmas caches. Both Mitch and Erin were really happy with their gifts. They actually just opened them today which is why this post is so late as I did not want to spoil the surprise! It’s going to be fun visiting the fort this summer and seeing the many innovative ways that Mitch and Erin have made use of their cache!
Yesterday was the last day of summer and I thought I’d honor the turning of the wheel and say good bye to the passing season with a few photos:
Goodbye to spontaneous wild flower arrangements in tin cans…
Goodbye to long, luxurious breakfasts on the patio…
Goodbye to butterfly visitors…
…encounters with little brown bats…
…and hard-working bees…
Goodbye to the dramatic storms, hail, tornado watches and booming thunder…
Goodbye to freshly picked herbs and medicinal teas…
…and goodbye to glasses of chilled white wine after a long day’s work in the blazing sun.
This has been another memorable and productive summer at cabinorganic! Thank you for sharing in my adventures and I look forward to many more projects, recipes, moments of wonder and adventures to come!
The final piece of the whole deck restoration puzzle is the reading deck. This space is located just outside of the dining room windows/door and it is a favorite spot to sit in the cool of the early mornings with a steaming mug of tea, facing east to watch the rising sun. In spring and fall, you can also see the glistening blue lake through the trees. As this part of the deck gets full sun from morning to mid-afternoon, it is the perfect spot to curl up with a good book (one of my favorite activities) during the cooler months. It is also a covered deck so Lucy and I sit out here during storms to enjoy the thunder and rain.
Here is a ‘before’ shot from inside of the cabin, taken last winter.
And here is the staining in progress. What a difference the darker stain makes, adding a crisp contrast to the rest of the cabin. I also scrubbed and sealed the deck floor and stained all of the window frames with the same dark stain.
The fun part was setting up the reading space. I did not buy anything new here but do plan on adding more pots of flowers for next year. This is a great time to buy pots as they are usually on sale this time of year.
Here is another ‘after’ shot of the reading deck taken from inside the cabin.
I also stained the entire front stairs. Here is a peek at the ‘before’ shot:
And ‘after’, looking so much cleaner and well-cared for.
Here is a ‘before’ shot of the entire front of the cabin: before staining the rails, stairs and window frames; before scrubbing and sealing the deck floor; before building the trellis on the patio (left) and covering up the open space with more trellis; before fixing the railing at the Zen deck and rearranging the stones near the patio. It doesn’t look too bad but the deck rails and stairs were very faded and didn’t stand out very much. Here are a few shots of how the cabin looks today. I am so pleased at how much better it looks!
My second summer has passed spent lovingly and patiently restoring the cabin. I thought this project would take a week at the most but with the spontaneous additions, repairs and rainy weather it ended up taking the entire summer! I am so grateful to B for his help and expertise!
Next year, I plan on sealing the concrete with a warm color, adding many more pots of flowers and planting a few more trees and shrubs in the front yard. I would also like to paint the green door and metal window frame a deep cranberry red.
Until then, this deck looks a whole lot better now. Not only does it adds some curb appeal and makes the cabin looked well-cared for, but the deck is now better protected from the weather. I look forward to many more projects and spending the days ahead here at cabinorganic!
There is a quiet spot on the deck, above the herb and tea garden and tucked away behind the front porch. Until now, this space was very neglected and never, ever used or visited. As B and I had been spending the summer staining, repairing and restoring the entire front deck, we finally came upon this little area and are very pleased with how the project turned out!
The ‘before’ photographs below were taken in June. The defining feature of this part of the deck is this sweet little bench built around a tree, but the tree was so over grown that it made the bench inaccessible and it also made the space feel very crowded. This is a shady spot and the tree continually drops leaves and berries, covering the deck floor which was stained almost black in color.
This is the master bedroom window. The window frame was stained the same color as the cabin and didn’t really stand out. The two bottom logs of the cabin were also black with mold (I had scrubbed off what I could before taking this picture).
There was a curious opening in the deck rails. I was told by the previous owner that they had planned on putting a hot tub out in the woods there. There is also this ‘look-out’ area at the far end where the deck rails had never been finished and many of the slats were missing.
Just beyond the look-out are some stairs leading down the to basement walkout door. It didn’t make sense to close this off so we decided to make some changes here in order to make this space inviting and connected to the rest of the cabin and woods.
While B got to work fixing the railing, I began staining the front deck rails just above the herb and tea garden (and planter) which lead to this part of the deck.
B closed up the opening with new railing and added the missing slats while I followed him with my can of stain…
Next, B removed the railing at the ‘look out’ and built three wooden stairs that connect with the stone stairs leading down to the back door.
Note: We will be moving the eavestrough so that it runs below the stairs but this will also involve digging a small trench so that we can extend the pipe about six feet to where the ground slopes away from the cabin.
I pruned the overgrown tree- which, by the way, turned out to be a chokecherry tree (and I have since made two batches of chokecherry jelly– recipes will be posted soon!). I stained the bench with the same black brown stain as the rails and now it really stands out as a focal point now.
I also scrubbed (and scrubbed and scrubbed) the entire deck floor by hand with the stiffest scouring brushes and pads I could find. The deck looked quite black, but when it was wet it was actually green… Moss? Algae? I scrubbed it until I could see the original wood again and then sealed it with a clear sealant. The deck floor is so much easier to sweep and keep clean, and it is quite satisfying to see the water bead up on the deck floor now whenever it rains instead of being soaked up by the wood.
I also stained the window frame and now the window looks sharp and crisp against the cedar cabin.
This is a very hidden, private and quiet part of the deck, surrounded by trees and in deep shade. I decided to make this a ‘Zen deck’- a place for peaceful retreat, for quiet work, or simply a place to reflect and contemplate. I found the perfect cast iron bistro set (at Canadian Tire) that has a bamboo pattern. I found the Buddha at Polly Maggo’s on Whyte Avenue in Edmonton. It is actually a water fountain and I will set it up once I find the right bowl for him to sit on. The blue ceramic garden stool that the Buddha is sitting on was purchased at Pier1 Imports.
Here is a what the Zen deck looks like now. I have added pots of shade-loving plants and just last week found a square red umbrella at Jysk. I love sitting out here, especially when it’s raining and I can sit under the umbrella and enjoy the peace of the woods.
Here is a view from the front of the cabin. As you can see, it is very dark and private.
And so another neglected, uninviting space has been turned into a new favorite place to spend quality time. I eat my breakfasts in the deep shade of this deck when it is too hot to eat on the patio, I blog and write here, and I also come here to simply sip tea and sit in solitude.
Next year, I plan on adding many more pots of ferns and other shade-loving plants in various sizes. I want to work on a painting on hang on the bare wall to the left of the window. I would like to add some hanging baskets to the tall rails and landscape the area along the stairs leading down to the back door. For now, I will enjoy watching the trees change to a golden yellow from the comfort of the Zen deck.
Do you remember this restoration project from last spring? Below is the extreme ‘before’ shot of this little promising patch of garden in the front yard taken last May. I spent a week lovingly moving stones, enriching the soil and planting a variety of perennial herbs and teas.
Here is another view of the ‘before’ stage. Please note the old, weathered stain on the deck and pay particular attention to the open area where the top of the garden meets the deck…Here is an ‘after’ shot taken last May. I had the garden all finished and planted but notice the deck and the open space at the top of the garden still needed to be addressed. Also, notice how the color of the old stain seems to blend in and downplay the beautiful deck…
This past summer as I was making my way around the huge deck with my paintbrush and can of stain, B asked me what I was planning on doing with this big, empty, unproductive space? I told him that I’d eventually like to build a planter box there for mint. While I continued staining, he instantly began working on it… B leveled the soil and then built this beautiful planter box mainly out of scraps and repurposed wood from the shed.
Once the planter box was finished he decided to take it a step further and address the empty space under the deck with some of the left over trellis from the patio project…
I love how clean this area looks now and notice the that by this time I had caught up with staining the deck in this area.
Here is another angle. The dark stain on the deck rails is a really nice contrast to the wood grain of the cabin. Instead of blending in it pops right out and frames the view quite nicely. Next year, I’d like to add a few large bright red clay pots in a variety of sizes to the concrete area for a splash of color.
Once again, here is another ‘after’ shot. As I write this, the planter is now bursting with peppermint that is waiting to be harvested and dried for peppermint tea. What was once a neglected, uninspiring spot in the garden is now productive and beautiful and adds to the ‘curb appeal’ of the cabin. The best part is that the new additions look as though they have always been there!
Stay tuned to see a neglected corner of deck turned into what I like to call, my restful Zen deck…
Since my last post on the patio projects, Brian has built a beautiful large planter box and replaced some of the front deck with trellis and I have scrubbed and stained the deck. I thought I would share some of the pictures with you so that you can see some of the work that has been taking place here all summer.
Since June, we have repaired, scrubbed, stained and renovated the entire front deck (the patio is attached to the right side of the deck). I will share all of the before and after pictures with you in the coming week in a series of posts.
Below is the planter box in progress. For most of the patio and deck projects, Brian was able to salvage odds and ends from the shed and rarely had to buy new wood.
The planter box was built to my specifications. I wanted to be able to put two large plastic pots inside so Brian measured the pots and built this custom planter box to match the trellis beside it. This box also serves as a half-wall which closes in the ‘outdoor room’ quite nicely and adds a bit more privacy when sitting at the table. By this time next year the boxes will be overflowing with flowers and tall ornamental grass, adding even more privacy.
Next year (phase 3), I plan on sealing the concrete with a warm honey color, adding two comfortable lounge chairs for the chiminea, and adding lots of large and medium pots for herbs and flowers to the patio area. I am also on the look-out for a large, circular outdoor rug.
Here is how the patio looks today:
To the left of the patio area is the right side of the front deck and it includes an interesting arrangement of rocks as a focal point. Here is what it used to look like just two months ago (this is what you look at while sitting at the patio table). Notice the old, faded deck stain which gave the cabin a sad, neglected look…
The rocks are piled quite high to high a gap in the boards. Brian decided to remove a few of these boards and install more trellis to match the patio trellis. He also kept going when he got to the cedar tree and added trellis to the decking behind and beyond the cedar. This was a lot of work and was tedious to install but was really worth it. It really makes the area feel cleaner as you no longer have to look at the uninspiring view under the deck. I also removed the metal fencing from around the cedar.
In progress…
Below is the final project as it looks today. Once the trellis was in place I no longer had to use so many rocks in the arrangement and I think having less improves the look. The dark stain on the deck adds a very nice crisp contrast to the cabin and it makes the rocks stand out more instead of blending in with everything else around it. I put a bright red pot on the right side of the rock platform and plan on putting a splashy water fountain in the main area of the rock platform (phase 3). I will also be adding some rock garden perennials in the the crack and crevices of the rocks.
These improvement to the deck and patio area cost very little money and a reasonable investment of time, creativity and elbow grease. With just a bit of effort, we have transformed an open and exposed, uninspired area of concrete into a cozy outdoor room that we use constantly now for meals and evening fires.
In a few days I will show you the improvements we made to the herb and tea garden, the creation of a ‘Zen deck’ and the freshening up of the reading lounge…
Last week my poor wonderful dog, Lucy got quilled for the second time.
The first time she was quilled she must have barely touched the porcupine as she only had eight quills in total- three in her nose (pictured above) and five in one of her front paws. The quills were not very deeply embedded so I like to believe that she was simply curious, went in for a tentative sniff and then quickly learned her lesson. She avoided the next porcupine we encountered on the side of the road a few months later so I naively assumed that she was safe from porcupine enounters.
Then last Tuesday evening when we were out for our evening walk, Lucy went leaping gracefully through some tall grass as she so often does. On her third landing she suddenly started yelping and running out of the grass. I thought that perhaps a coyote had nipped her and was chasing her (we run into them often but the encounters are never threatening) so I went running towards Lucy with my hiking poles ready to defend her. As Lucy came running towards me I saw that she was holding her body posture very awkwardly and that the entire inner parts of her front legs and her chest were covered in porcupine quills! It was quite gruesome and she seemed to have morphed into some kind of spiky X-men character. She must not have smelled the porcupine in the tall grass. Perhaps the wind was blowing away from her… And judging by the location of the quills, she must have landed right smack on top of the prickly animal. Lucy looked confused and in pain as she limped toward me. Lucky we were not far from home and we slowly made our way back to the cabin.
As we walked home I was wondering if I would be able to take out the quills myself. Last time Lucy was quilled, she was very jumpy and it took me almost two hours to trick her into letting me get close enough to pull the quills out. I was amazed and so proud of Lucy when this time around when she came right over to me and let me snip the tips off of the quills with a pair of scissors. Then she stood very still (she was actually trembling and probably in shock) while held her with one arm and quickly plucked out all of the quills from one of her legs with needle nose pliers. I gave her a few minutes to rest and walk around, then I called her again and did the other leg. After another short break I pulled the quills from her chest area and after a thorough body search found a few quills on the inside of her back legs.
Unfortunately I did not take a picture of her before pulling the quills out. It did not even enter my mind this time around. As soon as I saw Lucy’s quills my only thought was to get them out as quickly as possible. In total I pulled out 141 quills and found 2 more the following day. Since then, Lucy has been more careful on our walks and keeps to the wide path a lot more and she completely avoids the patch of tall grass where she encountered the porcupine!
I’m happy to say that Lucy is doing great! She was tender for a few days but there were no signs of infection and she recovered very quickly. She’s even started leaping again… but she has been keeping to the path where the grass is much shorter!
It’s been very exciting this past month as I have been focusing on the patio and deck area. What started out as an uninspiring, unfinished area that wasn’t much use to me is now one of my favorite places to eat, enjoy a fire and simply sit and enjoy the cabin.
There is a large concrete patio that extends from the driveway, along the deck and into this circular open area. I never liked it much as it looked so grey and institutional and seemed to be at odds with the surrounding wilderness. I decided to start last summer by staining the arbor a black-brown…
Hops grow up this arbor and here is a picture of how the arbor looks once the vines climb and grow over it.
Here is a before shot from behind…
And after staining. I find that this structure has much more impact now with the darker color stain.
Here is another structure that was never finished. I stained that as well…
And here are the two structures stained. This is as far as I got last summer. Note the circular concrete pad. It is the perfect spot for a patio set but I never used it as it was too hot and exposed with no privacy from the road.
Just this past month, I picked up where I left off with the project. B was a great help and had the creative idea of lifting the railing on two of the panels so that the trellis would provide more privacy.
What a difference!
I definitely have the privacy I was needing!
Here is the trellis all stained. It looks amazing now and adds to the comfort of the space as it provides shade and blocks the wind. B donated a small chiminea and we have been using it regularly for small fires.
This is still a work in progress. I would like to seal the concrete with a bit of a beige tint to warm up the grey. We are building a planter box to add even more privacy and I’d like to buy a bunch of large pots for flowers.
Last week I started staining the main deck and B added trellis, new railing and slats where they were missing and built a large planter box just above the herb garden along the deck. Everything is looking so elegant and I am impressed that such a low budget project could have so much impact and add to the curb appeal of the cabin. I just have a bit more staining to do and then I will post Phase 2 to share our hard work with you! In the meantime, I have a new cozy spot to curl up and simply enjoy life…
Do you remember that lovely painting done by my friend Omar that I wrote about back in March? I took it to be professionally framed six weeks ago and today I finally picked it up today! I choose a dark rustic frame that would provide a good solid contrast against the busy grain of the cedar walls and love the way it turned out!
I hung it in the perfect place… in the spacious front foyer, where it happens to be the first thing you see when you open the door and enter the cabin. It is also right above the umbrella stand where the blue and orange umbrella lives (when it is not raining) so I am curious to see how many people make the connection between the painting and the umbrella… as well as the personal connection between the painting and their host. I’ll try to take a better picture of the foyer tomorrow in daylight.
Thank you again (and again), Omar, from the bottom of my heart for creating a work of art that will bring joy and a smile each day. I do hope you and Kay will come and visit it! The framing job covered up the edge of the canvas where your signature was placed so I now need it resigned by the artist! Take care!